Processing a Payrun
Each periods payroll must be processed, this guide will go through the process that your payroll officer will perform.
Navigate
Menu > Payroll > Payruns
Generating a New Payrun
Once all timesheet data has been checked or approved, you can start your payrun.
Click New Payrun to start a new Payrun.
Configure and Review the Payrun settings
The Payrun settings can be reviewed and configured. Most settings should automatically populate correctly.
- If it's your first run in Microkeeper, you will need to select the run you want to process for.
- If it's your first payrun for the financial year, double check the number of runs that are expected for the year is correct.
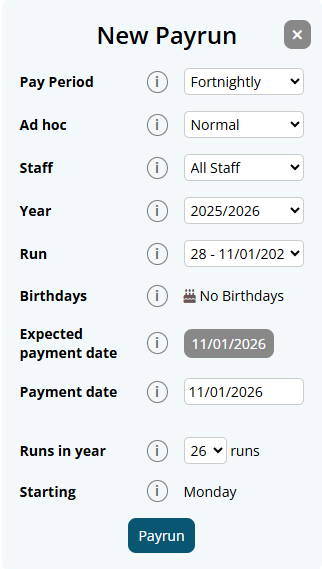
Here is a breakdown of the Payrun's configuration settings:
- Pay Period: The pay period of the Payrun. The default can be configued in the Global Settings.
- Adhoc: The Payrun type
- Normal: Standard Payrun with full payroll calculation
- Ad hoc - Full Payrun: Out of cycle Payrun that includes full payroll calculation.
- Ad hoc - Blank Payslips: Out of cycle Payrun skips payroll calculations creating blank Payslips.
- Staff: Selection of employees included in the Payrun.
- Year: The fiscal year of the Payrun.
- Run: The run of the year of the Payrun.
- Birthdays: Birthdays that fall within the pay period and the upcoming age of the employee. This is used to highlight any Pay Rate changes needed if applicable.
- Payment Date: The date the payment the Payrun will be processed for. The Expected Payment date can be clicked to autofill this value.
- Run in the year: How many Payruns are expected in the fiscal year. Microkeeper will predict how many runs are likely based on your payment date in arrears value.
- Starting: The day of the week the payrun starts on. This can be changed in the Global Settings.
Starting calculations
When you begin your Payrun, the timesheet data is converted into payroll data.
All the rules you have created are applied in relation to the timesheet data including overtime penalties, unpaid breaks etc.
Employee entitlements which include personal leave, annual leave, long service leave and/or rostered days off are calculated and accrued.
Super is calculated based on the employee's settings.
Tax is deducted using the current tax tables.
Completed calculations

After the calculations are complete, a line will be added to the Payrun feed.
If you need to run the payrun again for all staff you can click the grey Payrun button.
If you need to run the payrun again for an individual, there is a Payrun button on the individual's payslip.
Note: Microkeeper recommend running the individual Payrun button on the employees payslip instead.
To view the payslips for that run, click the Payslip button.
Applying Leave to a Payrun
Both worked and unworked leave will automatically appear on the payslip.
- For unworked leave please review the Leave and Public Holidays guide.
- For worked leave please review the Worked Public Holidays guide.
Unapproved Leave for the Payrun period
If there are any pending Leave Request that fall within the Pay Period, an error message will appear.
Clicking on the hyperlink will redirect to the applicable Leave Request for review.
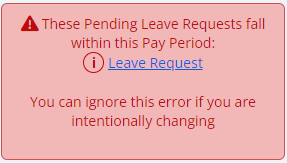
Note: Leave Requests that are one day outside of the period pay appear as the last day of a pay period may have went past midnight. If the employee did not work overnight, the error message can safely be ignored.
Reviewing a Payrun
To review a Payrun and the payroll data within, click the Payslip button.

A Breakdown of a Payslip
A Microkeeper Payslip provides a detailed overview of an employee's earnings, deductions, taxes and super contributions for the Payrun.
The sections of the Payslip cover:
Payments: Payments and earnings made to the employee including ordinary earnings, bonuses, Super exclusive earnings and leave accrued.
Expenses: Any before-tax deductions such as employer super contributions, voluntary concessional salary sacrifices, reportable fringe benefits.
Deductions: Any after-tax deductions such as child support, loan repayments, union fees.
Tax and Net Earnings: The tax amount withheld based on employees tax settings and the net earnings of the employee.

Using the Quick Action Buttons

The Quick Action Toolbar at the top of the payslip lets you quickly access key actions and information such as:
Timesheet: Open the Employee's timesheet for the pay period so you can review and modify worked hours.
Simulate: Display the data set used to generate the employee's payslip including the roster data, timesheet data, leave data and payroll automation breakdown.
Final: Initiate the Termination process for an employee. This will allow you to pay out any entitled remaining leave balances and also mark the employee as terminated for STP purposes.
Reprocess: Rerun the Payrun process for the individual employee's payslip.
Add Leave: Add Leave to the payslip. Useful for cashing out leave or paying leave outside of the Leave System.
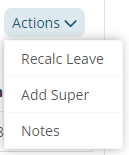
There are also some additional Actions too:
Recalc Leave: Recalculate the employee's leave balance based on current employee data. Use this after making changes that may affect leave accruals or balances.
Add Super: Add SGE or RESC super contributions.
Notes: Add, or edit notes to this payslip. Notes can be used to record important information or explanations for payroll adjustments
Editing a Payslip
Microkeeper payslips can be viewed as the digital representation of a paper payslip. Everything can be manually added or edited if needed.
Below is an example of a Payslip, on the right you can add, edit or delete any of the lines.
- Click the button to add a Payslip Item to any area of the Payslip
- Click the button to edit/updateany values or details on the Payslip
- A payslip item can also be deleted in the edit/update box by clicking the Delete button
Adding Bulk Amendments
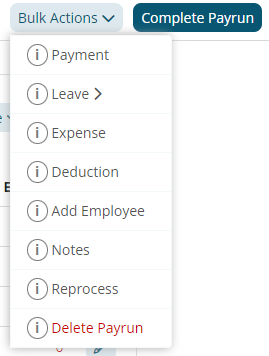
To bulk add a payment such as an Incentive or Bonus click Bulk Actions, and select the desired option:
- Payment
- Leave
- Expense
- Deduction
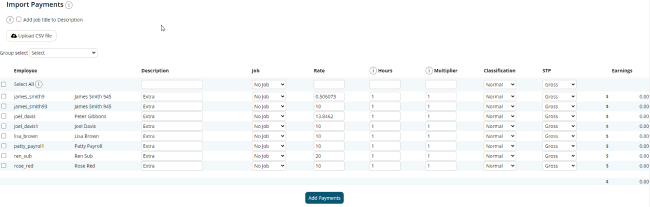
From this page you can
- Select employees that the payment applies to
- Add payment description
- Add the rate and multiplier
- Select the payment classification
- Import a CSV of Payments to be uploaded, the format of which matches column order in the above screenshot
Once you have entered in the relevant details click Add Payments
The details entered here will be automatically applied to the individual payslips.
To leave the page, click Back to Payslip
Import Payments from a file
To add payments from a file, for example, Salary Packaging.
Start by clicking the Bulk Actions button on the upper right, then click Payments.
Click Upload CSV File on the left.
Select a CSV File in the below column format and once uploaded it will fill the below fields with the details of the file.
Employee Name, Description, Job, Rate, Hours, Multiplier, Classification, STP class.
Terminating an Employee though a Pay Run
An employee can be terminated through the Payrun process.
Click the Final button on the employee Payslip.

The One Tap Terminate window will open allowing you to configure your termination process.
An employee can be paid out Annual Leave, TIL/RDO and Long Service Leave if required.
Configure the options as required and click Terminate
The Cessation Type is required before Employee's are Terminated.

The employee will be marked as terminated on Microkeeper and for STP purposes.
A Separation Certificate may be required for terminated employee's receiving Centrelink Benefits.
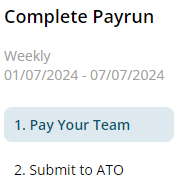
How to complete the Payrun
To Complete the Payrun, go to the Top Right, and select Complete Payrun.
The Payroll completion process is broken down into two main stages:
- Pay Your Team - This step involves backing up payslips, downloading an ABA file and making payslips available to staff.
- Submit to ATO - This step allows the lodgement of your payroll data
1. Pay Your Team
Confirm your Payment date

It is recommended that your Payslips are backed up.

If the payroll data is accurate, and the Payment Date is correct the aba file can be downloaded by clicking Download ABA.

Once the ABA File is downloaded, it will need to be uploaded to the Banking Portal to pay staff.

Then you can Print a copy of the Payslips as needed.

When pressed Lock and Continue moves into the second stage of Payroll completion.
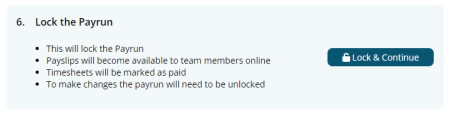
Note: A payrun can be unlocked to make changes but it is generally not recommend to make any changes to the values of a previously locked payrun. An Adhoc payrun can be generated instead.
2. Submit to ATO
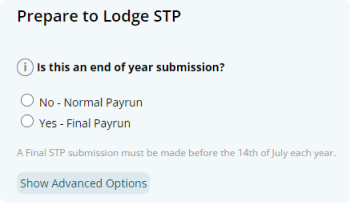
In the Prepare to Lodge STP area the type of STP Lodgement can be configured, the steps are:
Selecting Submission Type
The two options are:
- Normal Pay Run, which is the standard submission throughout the year.
- Final Pay Run, the only time this is used is on the Last Payrun processed in the Financial Year.
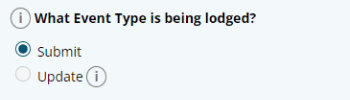
Selecting Event Type
The two options are:
- Submit: A Normal Submission, one allowed per Pay Run, on or Before the Payment Date.
- Update: An Out of Cycle submission, like after a payment date, or in July for a previous financial year.
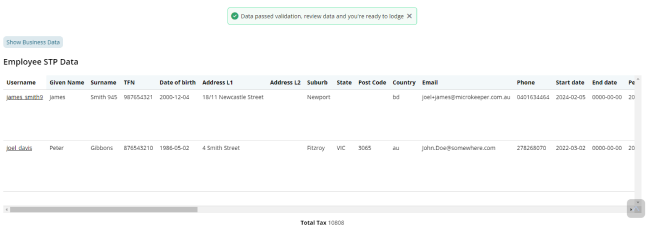
Reviewing Data
Click Review Data to begin reviewing the data being submitted to the ATO.
Microkeeper will run validation on all data then provide a report to review the data that will be submitted to the ATO.
If the validation fails, you will not be able to submit payroll data until all required fields are corrected. An error will display that includes a list of missing values and which staff are affected.
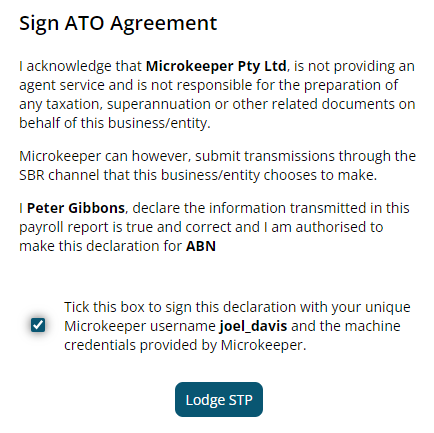
Submit the Lodgement
Click I have reviewed data, and sign the ATO Agreement, then Lodge STP.